Ubuntu Server - Landscape
Ubuntu's Landscape 17.03 is a centralized update management server for Ubuntu Server and Desktop. It allows you to configure a central Landscape server and the join your Ubuntu machines to that Landscape server with the Landscape client. The setup is relatively painless and provides some nice reporting as well as centralized management. Very handy stuff from Ubuntu! The free license will allow for management of 10 stand alone servers. You can purchase additional server licenses directly from Canonical with their advantage support.
Landscape Server Install:
After your initial Ubuntu server installation completes (I ran LTS 16.04) from the SSH prompt run the following:
sudo add-apt-repository ppa:landscape/17.03
sudo apt update
sudo apt install landscape-server-quickstart
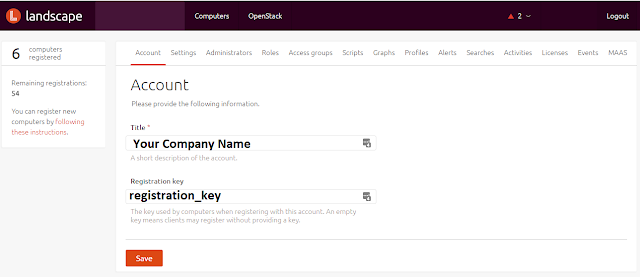
Once the installation has completed you'll be able to browse to https://hostname.FQDN/ and access the management website for Landscape. The first step is to setup all of the account settings so you can start deploying the clients. Click on "Account" and enter the appropriate information. To get the information you'll need for the client install later click the link on the left side of the page that says "following these instructions".
On the account page you'll want to enter your company name or designation and optionally you can input a registration_key.
The client setup page gives an example of what to enter to install the Landscape client on your Ubuntu servers. I'll go into more depth on that setup in the next section.
Landscape Client Install:
The client install should be run on any Ubuntu server you wish to manage from the Landscape server. I ran this on both version 14 and 16 servers. The first thing you'll need to do is copy the server certificate to the client's you want to register. I used WinSCP to download the certificate to my workstation and then used WinSCP again to copy the certificate to the client computer. You could also do this using ssh directly.
Landscape server certificate path: /etc/ssl/certs/landscape_server_ca.crt
Copy to the client here: /etc/landscape/server.pem
Now edit the /etc/landscape/client.conf file and add the following line to the end of the file:
pico /etc/landscape/client.conf
It probably looks something like this:
[client]
log_level = info
data_path = /var/lib/landscape/client
account_name = standalone
Now add the following line to the end of the file:
ssl_public_key = /etc/landscape/server.pem
Now you can run the installation on the client:
sudo apt-get update
sudo install landscape-client
sudo landscape-config --computer-title "My Web Server" --account-name standalone -p registration_key --url https://hostname.FQDN/message-system --ping-url http://hostname.FQDN/ping
You will be prompted to enter some information on screen. Most of that is not critical and can be changed later. The defaults are likely what you want. The last step will ask you to register the client with the server, select Y there and then go back to the Landscape web application and you should now see your computer under the "Computers" tab.
That's pretty much all there is to it, you can also use Landscape to manage cloud based Ubuntu deployments including within AWS.


No comments:
Post a Comment